Make Ahead Weeknight Dinner: Spiced Chicken Stuffed Peppers
Written by Invictus Member Kat Humphus from Kat’s Kitchen Collective
I know that sometimes making a healthy, elaborate dinner can seem like a time consuming process; but with this recipe, there are secret shortcuts for each step of the way that will make your time in the kitchen a minimum and your taste buds happier than ever!
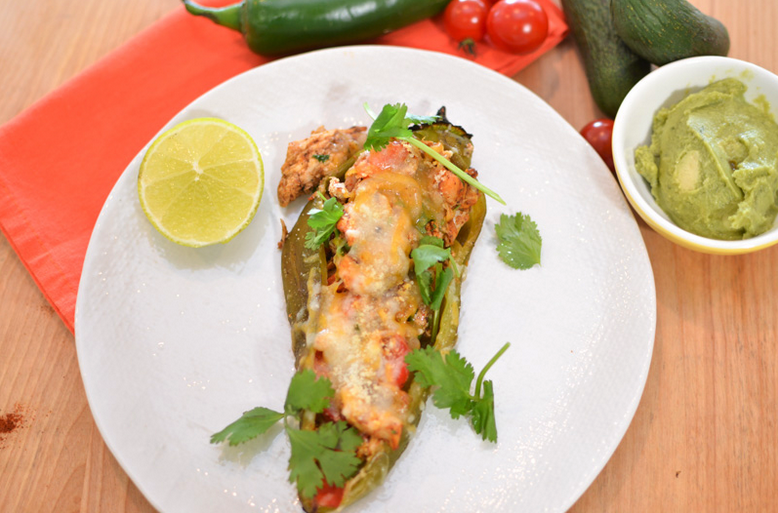
These spiced chicken stuffed peppers are a great dinner option when you’ve had your share of “meat-n-taters”. They are spicy, deeply seasoned, can be topped with your favorite guacamole or salsa, and best of all, can be made ahead of time!
The recipe starts by calling for a whole rotisserie chicken. You’re welcome to roast a whole chicken yourself if you’re feeling adventurous, but you can also simply swing by your favorite grocery store and pick up one of their ready-made versions (Shortcut #1!).
Also, you may have noticed there are a lot of different dried spices mixed in with the chicken. I like to pre mix the spices ahead of time in a big batch, and store the mix as “Chicken Enchilada Seasoning” in the freezer. That way I always have it on hand and can avoid taking out all of the spices to make one dish (Shortcut #2).
If you’re not one for slicin’ and dicin’, you can also use frozen peppers and onions (usually called fiesta mix, or something of the sort) in this recipe, instead of cutting up fresh ones – no one likes to cry from slicing onions (Shortcut #3)!
Maybe you don’t have a grill laying around, or maybe you don’t like peeling the skin off of peppers – that’s ok! You can buy Whole Green Chili’s in cans (my favorite is Hatch brand, sold at Costco!) and use those instead of fresh. The flavor and texture won’t be comprised at all (Shortcut #4).
And my last, and favorite short cut of all: You can actually assemble these stuffed peppers ahead of time, individually wrap them in plastic wrap, and store them in the freezer! This way you can take one out whenever you’re in the mood (Shortcut #5)!
Ingredients:
- 1 whole rotisserie chicken, cooked (about 2 lbs) (or any whole baked chicken you may have leftover!)
- 1 tbsp cumin
- 1 tbsp chili powder
- 1 tsp chipotle powder
- 1 tsp dried oregano
- 1 pinch cayenne
- 1/4 tsp black pepper
- 1/2 tsp salt
- 1 clove garlic, minced
- 1 cup red bell pepper – sliced
- 1 cup yellow onion – sliced
- 1 tbsp diced jalapeno
- 1 tbsp oil
- 5 anaheim chiles
- 1/4 cup cilantro, chopped
- 1/2 cup jack cheese (optional)
- 1/4 cup cotija cheese (optional)
Instructions:
1) Pull the meat off the bones of the rotisserie chicken. I like to start by putting gloves on and literally pulling the legs/thighs off with my hands. Then I will take a knife and run along the top edge of the chicken breasts and remove both breasts. The wings; I usually just eat since there isn’t a ton of meat on them anyways. Reserve in fridge until ready to use.
2) Pull the meat apart with your hands until it resembles “shredded” chicken.
3) Add your seasonings – cumin, chili powder, chipotle powder, dried oregano, cayenne, black pepper, and salt, 1 clove of minced, raw, garlic and mix together well.
**Pro tip: you can even do this a day ahead of time and let marinate!**
4) Slice your red bell pepper, onion, and jalapeño. Heat a pan with 1 tbsp of oil on medium-high heat, and place all veggies in. Saute on medium high heat for about 4 minutes, stirring often. Once cooked, let the veggies cool down before adding it to the chicken mixture. **Pro tip: you can even do this a day ahead of time as well!
5) Now it’s time to grill your peppers. Crank your grill up to medium high heat and place the anaheim chiles right on the grill. You’re looking for them to burn and blister, but you want it to happen evenly, so make sure you continuously rotate the peppers while they are cooking.
6) Once blistered, place the chiles into a bowl and cover immediately with plastic wrap. The steam will help the skins come right off. Wait about 7 minutes.
7) While the peppers are still hot – carefully peel the blistered skins right off of the chiles. They should come off super easy, especially if you covered the bowl with plastic wrap while they were still hot. You can run a little cold water on the chiles to help them cool off a bit while you are peeling them, and also to wash away any charred skin scraps.
8) Once all of your chiles are peeled, using a small paring knife, place a small slit down the center, making sure to only go through the top layer of the pepper, not through the entire thing.
9) Remove the seeds with your hands. You may also want to use cold water to wash away the inside of the seeds if you want to make sure you get all of them out.
10) Combine your peppers and onions with your chicken mixture, and with the cheeses if you so desire. Add in your chopped cilantro and mix well.
11) Place a heaping spoonful of the chicken/pepper/cheese mix into your pepper. Fill it up generously, and use your hands to form the sides of the pepper around the chicken.
12) Once all of your peppers are stuffed – you can easily individually wrap them in plastic wrap and freeze for later use!
To heat up from a frozen state: I will let defrost the chicken stuffed chiles on the counter for 20 minutes, or overnight in the fridge. You can add more cheese to the top of your chili right before baking, and then place them in a preheated oven at 375 degrees for about 12-15 minutes. Serve with your favorite toppings and enjoy!
If you absolutely do not want to wait to eat them, you don’t have to! Just top with additional cheese and place in a preheated oven at 375 degrees for 12-15 minutes. Enjoy!
I absolutely love this recipe not only for the taste, but the convenience also. I know you will too!
Did you enjoy this recipe? Sign up for our mailing list by clicking here to find out about new recipes made just for you! Also check out the Kat’s Kitchen Collective blog for more free recipes and kitchen tips from Chef Kat.